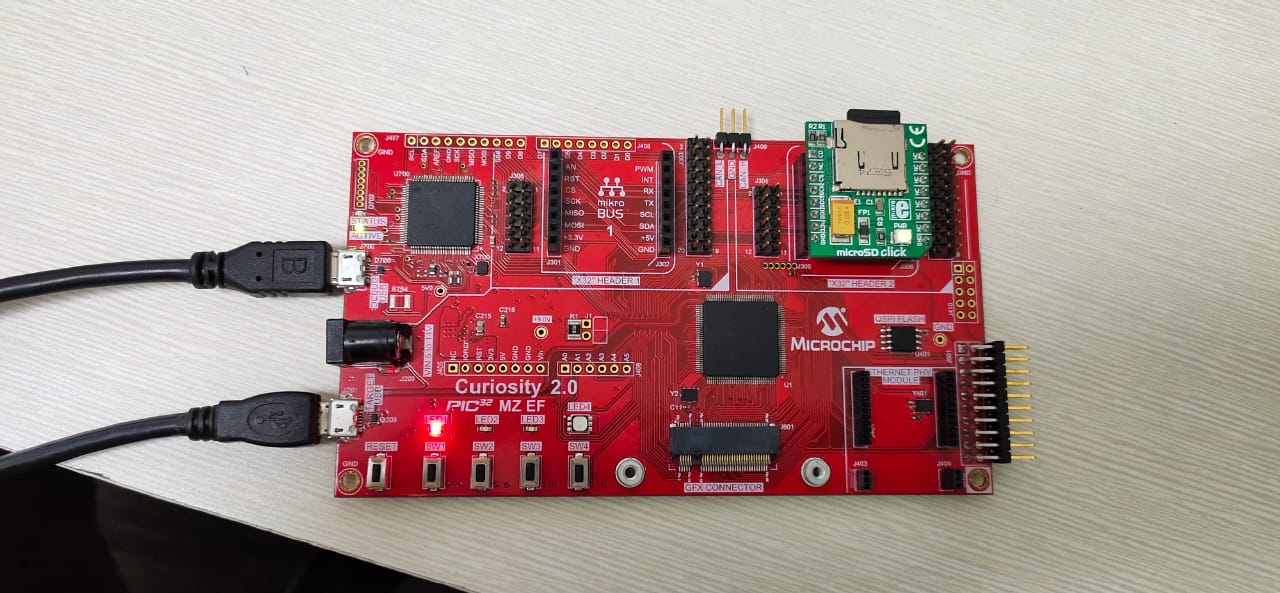

USB MSD with Multiple Drives Application on Curiosity PIC32MZ EF 2.0 Development Board
Download
Description
This application demonstrates the creation of a USB device with multiple drives or logical units (LUN). The storage media - SD Card, acts as one drive, and the internal flash memory (NVM) acts as the second drive. Data transfer between a computer and the logical units (SD Card / NVM) takes place through USB MSD class.When connected to a USB Host (PC) both the SD Card and the NVM appear as two separate drives on the Host PC.
Modules/Technology Used:
- Peripheral Modules
- Core Timer
- Driver Modules
- NVM driver
- SDSPI driver
- Memory Driver
- System Service Libraries
- File System
- Middleware Libraries
- USB Device stack
Hardware Used:
Software/Tools Used:
This project has been verified to work with the following versions of software tools:
- MPLAB Harmony v3 “csp” repo v3.8.3
- MPLAB Harmony v3 “core” repo v3.8.1
- MPLAB Harmony v3 “dev_packs” repo v3.8.0
- MPLAB Harmony v3 “mhc” repo v3.6.5
- MPLAB Harmony v3 “bsp” repository v3.8.2
- MPLAB Harmony v3 “usb” repository v3.7.0
- MPLAB Harmony 3 Launcher Plugin v3.6.2
- MPLAB X IDE v5.45
- MPLAB XC32 Compiler v2.41
Because Microchip regularly update tools, occasionally issue(s) could be discovered while using the newer versions of the tools. If the project doesn’t seem to work and version incompatibility is suspected, It is recommended to double-check and use the same versions that the project was tested with.
Setup:
- Mount the microSD click board on the mikro bus 2 interface (J306) on Curiosity PIC32MZ EF 2.0 Development Board
- Insert a micro SD card into the microSD click board card slot
- Power the Curiosity PIC32MZ EF 2.0 Development Board from a Host PC through a Type-A male to micro-B USB cable connected to Micro-B port (J700)
- Connect the Curiosity PIC32MZ EF 2.0 Development Board to the Host PC as a USB Device through a second Type-A male to micro-B USB cable connected to Micro-B port (J201)

Programming hex file:
The pre-built hex file can be programmed by following the below steps.
Steps to program the hex file
- Open MPLAB X IDE
- Close all existing projects in IDE, if any project is opened.
- Go to File -> Import -> Hex/ELF File
- In the “Import Image File” window, Step 1 - Create Prebuilt Project, Click the “Browse” button to select the prebuilt hex file.
- Select Device has “PIC32MZ2048EFM144”
- Ensure the proper tool is selected under “Hardware Tool”
- Click on Next button
- In the “Import Image File” window, Step 2 - Select Project Name and Folder, select appropriate project name and folder
- Click on Finish button
- In MPLAB X IDE, click on “Make and Program Device” Button. The device gets programmed in sometime
- Follow the steps in “Running the Demo” section below
Programming/Debugging Application Project:
- Open the project (msd_multiple_luns\firmware\pic32mz_ef_curiosity_v2.X) in MPLAB X IDE
- Ensure “Curiosity/Starter Kits PKOB4” is selected as hardware tool to program/debug the application
- Build the code and program the device by clicking on the “make and program” button in MPLAB X IDE tool bar
- Follow the steps in “Running the Demo” section below
Running the Demo:
- Reset or power cycle the devcie
- Wait for the host computer to read the contents of the two media (SD Card and NVM)
- The device should appear as two new drives on the your personal computer
- The NVM media should appear as “Drive Name” and should have a sample “FILE.txt” file
- The drive name for the SD card media depends on the micro SD card vendor. The drives can then be used to read or write files
- LED3 illuminates once Curiosity 2.0 board is enumerated as a Mass Storage Device by the USB host and LED2 will be illuminated when USB is not plugged.
Note: Reprogramming the development board will cause any stored files in the NVM media to be erased
Comments:
- While formatting the SD card, change allocation unit size to 32K. This helps in reading the contents of the SD card faster. (To change allocation unit size, Right click on Drive > Select Format > change Allocation unit size)
- This application demo builds and works out of box by following the instructions above in “Running the Demo” section. If you need to enhance/customize this application demo, you need to use the MPLAB Harmony v3 Software framework. Refer links below to setup and build your applications using MPLAB Harmony.
Revision:
- v1.2.0 - Regenerated and tested application.
- v1.1.0 regenerated and tested the demo application
- v1.0.0 released demo application